
20+ Red & Green Christmas Nails: Easy Festive Ideas
Many people look for festive nail designs to celebrate the holidays. Red and green nails are the perfect choice for Christmas because they instantly bring holiday cheer. With a few tools and a simple plan, they can get salon-worthy results at home. The best part is how flexible the colors are bold, glittery, minimal, or classic all work. Even short nails look great with a smart, simple design.
This guide shares easy, creative, and stylish ideas for red and green nails, whether they do them at home or in a salon. Each idea comes with clear tips to help polish and last longer, and shine brighter. Readers will find designs for every mood, from quick-and-cute accents to party-ready sparkle. Keep reading to discover ideas that make red & green Christmas nails festive, fun, and picture‑perfect.
20+ Red & Green Christmas Nail Ideas
1. Classic Red & Green Alternating Nails
Simple and timeless, this style alternates red and green on each nail for a clean, festive look. It suits all nail lengths and shapes, from natural short nails to almond tips. The colors photograph beautifully next to cozy sweaters and twinkly lights. It’s a fast way to get in the spirit when time is short. This is a perfect base for red & green Christmas nails purists.

Pair with a top coat for a glossy finish that lasts longer and avoid smudges by letting each nail dry. They can add a single white dot near the cuticle for extra charm.
Tip: Cap the free edge with top coat to prevent chips. A drop of cuticle oil makes the finish look fresh.
2. Red Nails with Green Glitter Accent
Adds sparkle to a classic red manicure with one or two green glitter nails as an accent. This twist feels festive but not over the top, so it works for office gatherings and dinner parties. Glitter catches light and adds depth in photos. It’s also a great option for beginners who want something special.

Apply glitter polish carefully and seal with a top coat to prevent chipping. They can sponge on glitter for a dense, even look.
Tip: Choose fine glitter for a smoother surface and easier removal later. A quick refresh of the top coat midweek keeps the sparkle strong.
3. Green Nails with Red Polka Dots
Festive and playful design featuring red polka dots on a green background. Dots add personality without much effort and flatter short nails. The style pairs nicely with plaid scarves and cozy cardigans. It delivers instant holiday vibes.
Use a dotting tool for even, round shapes; finish with a top coat for a smooth look. They can vary dot sizes for a lively effect.
Tip: Practice on a swatch before the nail to get spacing right. A matte base under glossy dots adds cool contrast.
4. Red & Green Striped Nails
Horizontal or vertical stripes in alternating red and green create a candy-cane effect. Vertical stripes elongate the nail, while horizontal stripes make a bold statement. The design looks crisp with a fine brush and steady hand. It’s a strong choice for red & green Christmas nail fans who like patterns.

Keep stripes thin and precise using nail striping tape or a thin brush. Let each color dry before adding the next line.
Tip: Add a thin white line between colors for an ultra-festive touch. Seal with a glossy top coat to smooth edges.
5. Matte Red & Glossy Green Combo
A modern twist using matte red polish on most nails with one glossy green accent nail. The finish contrast looks luxe without extra art. It works on any length and pairs with gold rings. This combo is simple but striking.

Matte top coat helps create a soft finish, while glossy accent nails pop for contrast. They can flip the colors for variety.
Tip: Avoid oils and hand cream before applying matte top coat to keep the finish even. A side-by-side photo shows the contrast beautifully.
6. Glitter Gradient Red to Green
Fade glitter from red at the base to green at the tips for an ombre effect. The gradient catches light and looks party-ready. This is perfect for evening events and holiday photos. It pairs well with velvet or satin outfits.

Use a sponge to blend glitter smoothly and seal with top coat. They can reverse the fade on one accent nail for interest.
Tip: Layer sheer glitter over a solid base to avoid thick buildup. Clean around cuticles with a small brush for a pro finish.
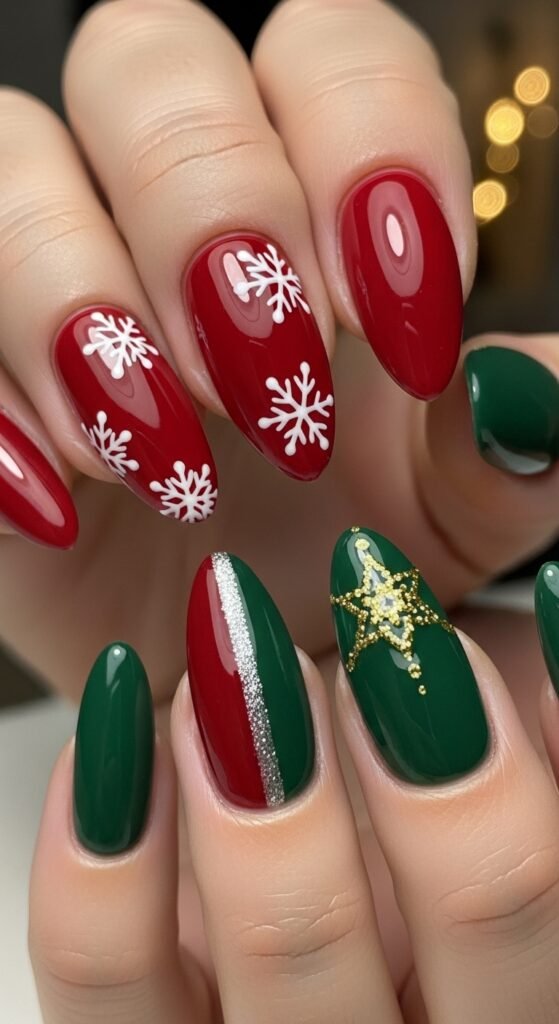
7. Snowflake Design on Red Nails
Red nails with white or green snowflake designs for a wintery touch. Snowflakes look delicate and festive in all lengths. The contrast pops in pictures and adds detail without busy patterns. It’s cozy and classic.

Draw snowflakes with a thin brush or use nail stickers; finish with top coat. They can add a tiny gem at the center for sparkle.
Tip: Add tiny dots around flakes to mimic falling snow. A glossy seal brings everything together.
8. Candy Cane Nails
Red and white stripes with green accents, mimicking candy canes. This playful look is a holiday staple that suits all ages. It’s Instagram-ready and fun for parties. The design pairs perfectly with a red lip.

Thin striping tape ensures neat stripes; seal with top coat for longevity. They can add a small green bow detail on one nail.
Tip: Angle stripes diagonally for a slimming, dynamic look. Patience between layers keeps lines crisp.
9. Red & Green Chevron Pattern
V-shaped chevron pattern alternating red and green for a trendy look. Chevron adds movement and makes nails look longer. It’s bold but can be softened with thin lines. Great for medium-length nails.

Apply nail guides to keep chevrons precise and finish with a glossy top coat. They can add a thin strip of gold at the point for shine.
Tip: Keep lines narrow for a refined finish that’s easy to wear. One or two accent chevrons work well, too.
10. Green Base with Red Tips
Similar to French tips but festive with green nails and red tip accents. It’s neat, wearable, and perfect for work-to-party days. The look reads polished without heavy art. It flatters almond and squoval shapes.

Use tape to create clean edges for the tip, and a top coat for shine. They can add micro‑glitter to the tips for sparkle.
Tip: Curve the tip to follow the natural smile line for a custom fit. A second top coat extends wear.
11. Red Base with Green Glitter Tips
A festive twist on French tips using green glitter over a classic red base. The sparkle shines under string lights and candles. It’s an easy upgrade that still feels elegant. Perfect for holiday dinners.

Apply glitter carefully at the tip and blend slightly for a smooth transition; seal with a top coat. They can add a slim white line under the glitter to define the tip.
Tip: Use cosmetic sponges to concentrate glitter at the edge. Clean sidewalls for a tidy outline.
12. Green Nails with Red Stripes
Thin red stripes over a green base create a subtle yet festive pattern. This design reads modern and works well on short nails. It’s great for matching green sweaters or plaid scarves. Minimal but merry.

Use striping tape or a fine brush for neat, straight lines; finish with a top coat for shine. They can add one vertical stripe on each nail for consistency.
Tip: Keep stripes thin to avoid overpowering the base. A high-gloss top coat seals the deal.
13. Red & Green Polka Dot Accent Nails
Mostly red nails with one or two green nails decorated with red polka dots. Accent nails highlight the pattern while keeping the set clean. This is fast to do and easy to maintain. It’s a cheerful option for red & green Christmas nails.

Polka dots add playfulness; use a dotting tool and a top coat for a long-lasting finish. They can add one white dot inside each red dot for contrast.
Tip: Place dots in a grid for a tidy, polished look. Seal twice for an ultra-smooth surface.
14. Metallic Green with Red Glitter Accents
Metallic green nails paired with subtle red glitter details for a sparkling holiday look. Metallic polish reflects light and looks luxe. A touch of red glitter adds depth without covering the base. It’s party-ready and chic.

Glitter enhances metallic polish; finish with a clear top coat to prevent chipping. They can add glitter to the cuticle for a half‑moon shine.
Tip: Keep layers thin to preserve the metallic mirror effect. Avoid hand cream before painting.
15. Red & Green Snowflake Pattern
Festive snowflakes in white or green over a red background. Mixing flake sizes keeps the design interesting. It looks cute with mittens and mugs in photos. It’s winter magic on nails.

Draw snowflakes with a thin brush or use nail stickers; seal with a top coat. They can outline one flake with glitter for sparkle.
Tip: Keep flake centers small to avoid smearing when top coating. Work one nail at a time.
16. Green Base with Red French Tips
Classic French tips but with a Christmas twist: green base with glossy red tips. The bold colors feel festive yet tailored. It’s a nice pick for shorter nails. Pairs well with minimal rings.

Use tape to create a clean line and add a top coat for shine. They can add a micro‑gold stripe between the tip and the base.
Tip: Stick to thin tips for a sophisticated look. Re-top every two days for extra longevity.
17. Red Nails with Green Glitter Half-Moon
Half-moon design at the cuticle in green glitter over red nails. This vintage-inspired style looks elegant and fun. The glittering moon catches light with every move. Great for formal events.

Use stickers or careful brushwork to create the half-moon; seal with a top coat. They can add a tiny star sticker at the moon’s edge.
Tip: Keep the moon shallow for a refined, subtle effect. Let each coat dry fully to avoid dragging.
18. Ombre Red to Green Nails
Smooth gradient transitioning from red at the base to green at the tips. It’s artsy, modern, and perfect for statement outfits. A well-blended ombre looks professional. It’s a favorite for red & green Christmas nail lovers.

Use a makeup sponge for blending; the op coat seals the gradient. They can add a light glitter wash on top for sparkle.
Tip: Use sheer polishes to make blending easier. Clean up edges with a small brush for crisp lines.
19. Red Nails with Green Stars
Red nails decorated with small green stars for a playful holiday vibe. Scatter stars near the tips or on one side. This design looks cute in selfies and short videos. It’s easy but eye‑catching.

Apply stars with stickers or a fine brush; finish with a top coat for durability. They can add a single silver star on each hand for contrast.
Tip: Keep stars tiny for a tidy look. Double top coat for a glassy, long‑lasting finish.
20. Green Matte Nails with Red Glossy Accent
All matte green nails with one glossy red nail to make a striking contrast. The finish difference looks editorial and polished. It suits any nail length. Minimal yet festive.

Matte finish adds modern style; accent nail pops in glossy shine. They can add a glossy red stripe on a matte nail for cohesion.
Tip: Avoid oils before matte top coat to prevent patchiness. Finish with cuticle oil after full drying.
21. Candy Cane Stripes
Red and green diagonal stripes on a white or clear base create a classic candy cane look. It’s bold, fun, and loved by kids and adults alike. The diagonal angle adds length visually. This pattern is a holiday favorite.

Use thin striping tape or a fine brush to achieve neat lines; seal with a top coat for shine and longevity. They can do just two accent nails if time is tight.
Tip: Keep lines consistent in width for a clean finish. A fast‑dry top coat protects detail.
22. Red Base with Green Plaid Accent
A red set with one or two green plaid accent nails feels cozy and classic. The pattern pairs well with flannel and winter coats. It delivers holiday charm without busying every finger. It’s ideal for medium lengths.

Paint the accent nail green, then add thin red and black lines to form plaid.
Tip: Keep stripes fine and spaced evenly for a neat finish. They can add a gold line for subtle shine. Seal twice to smooth the pattern.
Pro Styling Tips
- Always start with a clean base coat to protect nails.
- Thin layers prevent smudges and uneven polish.
- Seal designs with a top coat for longevity and shine.
- Keep nail tools clean for precise designs.
Final Thoughts
Red and green Christmas nails are versatile, cheerful, and easy to personalize. With a few simple tools and a little practice, anyone can create designs that look festive and polished. They can start with alternating colors, then try stripes, glitter, or a single art accent. A strong base coat, thin layers, and a glossy top coat help every look last.
Whether they go bold with plaid and chrome or keep it minimal with dots and tips, red & green Christmas nails bring instant holiday spirit. Mix finishes, play with accents, and have fun. Snap a pic under the tree those nails will be ready for the spotlight.
FAQs
Can these designs be done at home by beginners?
Yes. Start with alternating colors, simple dots, or a single accent nail, and use stickers for detailed art.
How long do red & green Christmas nails last?
With base and top coat, most sets last 5–7 days. Reapply top coat every other day to extend wear.
Can other colors be added, like gold or silver?
Absolutely. Gold, silver, and white pair beautifully with red and green for a festive finish.
What’s the best way to remove glitter polish?
Soak cotton with remover, place on the nail, wrap with foil for 5–10 minutes, then slide off.
Are these designs suitable for short nails?
Yes. Choose simpler patterns like dots, tips, single snowflakes, or a plaid accent.
Should they choose matte or glossy?
Both work. Matte feels modern; glossy brings extra shine and depth to glitter.
Can nail stickers replace hand‑painting?
Yes. Stickers and decals are beginner‑friendly and look clean when sealed with a top coat.
How do they prevent chipping?
Apply thin layers, cap the tips with top coat, avoid long hot soaks, and don’t use nails as tools.
Is it okay to do only one or two accent nails?
Definitely. Accent nails with glitter, stripes, or tree art look stylish and save time.
How often should cuticle oil be applied?
Daily. Hydrated cuticles support stronger nails and help polish last longer.